SSH (Secure Shell) is an essential tool for remotely managing IoT (Internet of Things) devices securely from your Mac without compromising your data privacy. Whether you're a beginner or an experienced user, understanding how to set up and use SSH for remote IoT management can significantly enhance your productivity and control over your networked devices. This guide will walk you through the steps to use SSH for IoT devices on a Mac for free.
SSH is not only secure but also a cost-effective solution for accessing IoT devices remotely. It eliminates the need for expensive third-party tools while ensuring a reliable connection between your Mac and IoT devices. Whether you're monitoring smart home devices, managing industrial sensors, or controlling remote servers, SSH offers a robust and encrypted communication channel.
This article will delve into the step-by-step process of setting up SSH on your Mac for IoT devices, including troubleshooting tips, security best practices, and valuable insights to help you master this powerful tool. By the end of this guide, you'll have the knowledge and confidence to implement SSH for your IoT projects efficiently.
Read also:Eva Longoria
Table of Contents
- Introduction to SSH
- Why Use SSH for IoT?
- Prerequisites for Using SSH on Mac
- Setting Up SSH on Mac
- Connecting to Remote IoT Devices
- Securing Your SSH Connection
- Troubleshooting Common SSH Issues
- Advanced SSH Features for IoT
- Best Practices for SSH Remote IoT
- Conclusion and Next Steps
Introduction to SSH
SSH, or Secure Shell, is a cryptographic network protocol designed to provide secure communication over an unsecured network. It allows users to remotely access and manage devices, including IoT devices, without exposing sensitive information to potential threats. SSH encrypts all data exchanged between the client (your Mac) and the server (IoT device), ensuring that your commands and data remain confidential.
One of the key advantages of SSH is its platform independence, meaning it works seamlessly across various operating systems, including macOS. By leveraging SSH, you can manage IoT devices from your Mac without requiring additional software or hardware investments. This makes it an ideal choice for both personal and professional IoT projects.
How SSH Works
SSH operates on a client-server model, where the client initiates the connection and the server responds. The protocol uses public-key cryptography to authenticate the server and, optionally, the client. Once the connection is established, all communication is encrypted, ensuring data integrity and confidentiality.
- Encryption: SSH uses strong encryption algorithms to protect data in transit.
- Authentication: Users can authenticate using passwords or public-key authentication for enhanced security.
- Port Forwarding: SSH supports port forwarding, allowing you to securely access services running on the remote IoT device.
Why Use SSH for IoT?
Using SSH for IoT devices offers numerous benefits, making it a preferred choice for remote management. Below are some compelling reasons to consider SSH for your IoT projects:
- Security: SSH ensures secure communication by encrypting all data exchanged between your Mac and IoT devices.
- Reliability: SSH connections are stable and can be configured to automatically reconnect in case of interruptions.
- Cost-Effective: SSH is free to use and does not require additional licensing or subscription fees.
- Flexibility: SSH supports a wide range of commands and services, making it suitable for various IoT applications.
SSH vs Other Remote Access Tools
Compared to other remote access tools, SSH stands out due to its focus on security and simplicity. Unlike proprietary solutions that may require complex setups or recurring costs, SSH is open-source and easy to implement. Additionally, SSH's widespread adoption ensures compatibility with most IoT devices and platforms.
Prerequisites for Using SSH on Mac
Before you can use SSH to remotely manage IoT devices on your Mac, you'll need to ensure that your system meets the following prerequisites:
Read also:25 Money Secrets Pdf Free Download Unlock Financial Wisdom Today
- macOS Installed: Ensure your Mac is running the latest version of macOS for optimal performance and security.
- SSH Client: macOS comes with a built-in SSH client, so no additional installation is required.
- IoT Device with SSH Server: Your IoT device must have an SSH server installed and running to establish a connection.
Checking SSH Availability on Mac
To verify that SSH is available on your Mac, open the Terminal application and type the following command:
ssh -V
This command will display the version of SSH installed on your system, confirming that it is ready for use.
Setting Up SSH on Mac
Setting up SSH on your Mac is a straightforward process. Follow these steps to configure SSH for remote IoT management:
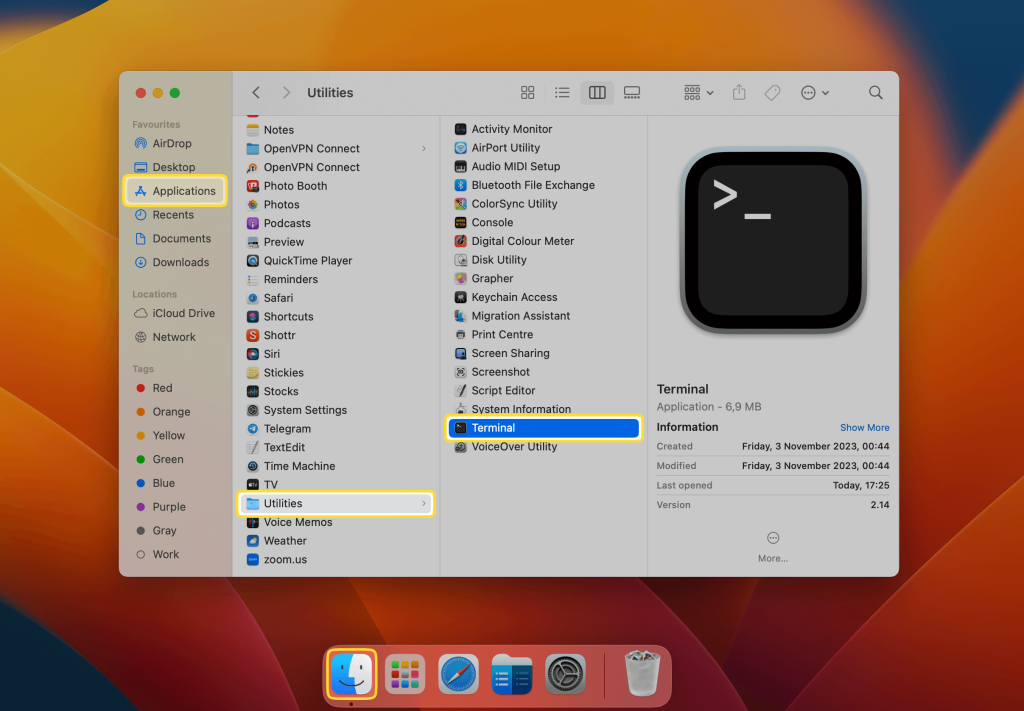
- Open Terminal: Launch the Terminal application from your Applications/Utilities folder.
- Generate SSH Keys: Use the ssh-keygen command to create a public-private key pair for authentication.
- Copy Public Key: Transfer your public key to the IoT device using the ssh-copy-id command.
- Test Connection: Establish an SSH connection to your IoT device using the ssh command followed by the device's IP address.
Generating SSH Keys
To generate SSH keys, use the following command in the Terminal:
ssh-keygen -t rsa -b 4096 -C "your_email@example.com"
This command creates an RSA key pair with a key size of 4096 bits and associates it with your email address for identification purposes.
Connecting to Remote IoT Devices
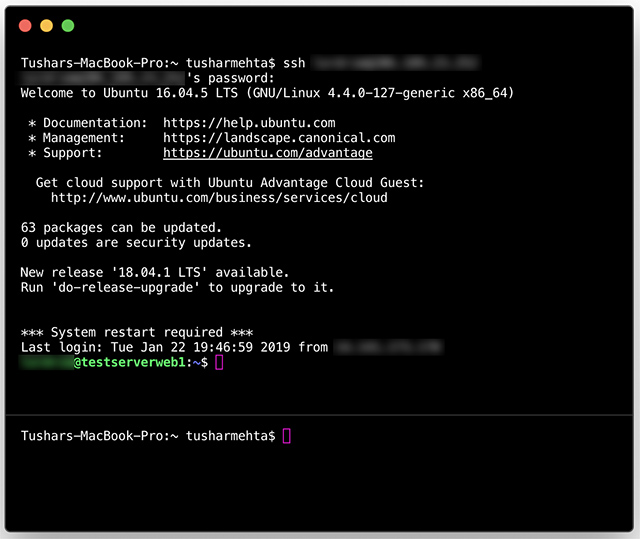
Once SSH is set up on your Mac, connecting to remote IoT devices is as simple as entering the correct command. Use the following format to establish a connection:
ssh username@ip_address
Replace "username" with the login name for your IoT device and "ip_address" with the device's IP address.
Tips for Efficient Connections
- Use Aliases: Create aliases in your SSH config file to simplify connection commands.
- Enable Compression: Use the -C option to enable compression for faster data transfer.
- Set Timeout Limits: Configure serverAliveInterval to prevent disconnections during idle periods.
Securing Your SSH Connection
Security is paramount when using SSH for remote IoT management. Implement the following best practices to safeguard your connections:
- Disable Password Authentication: Use public-key authentication exclusively to reduce the risk of brute-force attacks.
- Change Default Port: Modify the default SSH port (22) to make it harder for attackers to target your connection.
- Limit User Access: Restrict SSH access to specific users or groups to minimize unauthorized access risks.
Firewall Configuration
Configure your firewall to allow SSH traffic only from trusted sources. Use tools like iptables or macOS's built-in firewall to define rules that restrict access to your SSH port.
Troubleshooting Common SSH Issues
Even with proper setup, you may encounter issues when using SSH for IoT devices. Below are some common problems and their solutions:
- Connection Refused: Ensure the SSH server is running on the IoT device and that the firewall allows incoming connections.
- Authentication Failed: Verify that your public key is correctly added to the IoT device's authorized_keys file.
- Timeout Errors: Check your network configuration and ensure there are no routing issues between your Mac and the IoT device.
Using SSH Logs for Debugging
SSH logs can provide valuable insights into connection issues. Enable logging on your IoT device and review the logs for detailed error messages that can help diagnose and resolve problems.
Advanced SSH Features for IoT
SSH offers several advanced features that can enhance your IoT management capabilities:
- Tunneling: Use SSH tunnels to securely access services running on your IoT device, such as web servers or databases.
- File Transfer: Utilize SCP (Secure Copy Protocol) or SFTP (SSH File Transfer Protocol) for secure file transfers between your Mac and IoT devices.
- Port Forwarding: Configure local or remote port forwarding to access services behind firewalls or NATs.
SSH Config File
Create a custom SSH config file to streamline your connection settings. Add entries for each IoT device, specifying the hostname, port, and other parameters to simplify future connections.
Best Practices for SSH Remote IoT
To maximize the effectiveness and security of SSH for remote IoT management, follow these best practices:
- Regular Updates: Keep your SSH client and server software up to date to patch vulnerabilities and improve performance.
- Monitor Connections: Use tools like fail2ban to monitor and block suspicious SSH connection attempts.
- Document Settings: Maintain detailed documentation of your SSH configurations and connection parameters for easy reference.
Training and Education
Stay informed about the latest SSH developments and best practices by attending workshops, reading documentation, and participating in online forums dedicated to IoT and cybersecurity.
Conclusion and Next Steps
In conclusion, using SSH for remote IoT management on a Mac is a secure, efficient, and cost-effective solution. By following the steps outlined in this guide, you can set up and maintain SSH connections to your IoT devices with confidence. Remember to prioritize security, implement best practices, and continuously update your skills to stay ahead in the ever-evolving field of IoT.
We encourage you to share your thoughts and experiences in the comments section below. Additionally, explore our other articles on IoT and cybersecurity to expand your knowledge and enhance your projects. Together, let's build a safer and smarter connected world!